Pages

Labels

Friday, 23 October 2015

Embellish Stitch and Felt Book Review

Does anyone else take the approach of thinking of how much you are saving rather than how much you are spending when you see a sale?

Last week  I was a little bit naughty, I found a Simplicity embellisher on Amazon, reduced from £300 to £100, normally I am a bit sceptical when I see such discounts and think they have previously hyper-inflated the price just so they can offer incredible "discounts" but a quick look around the internet revealed £300 is the standard price for an embellisher and it appears this particular model is about to be superseded, hence the reduced price.

Acknowledging that I know almost nothing about using these machines I bought a book at the same time, Sheila Smith's Embellish, Stitch, Felt, Using the embellisher machine and needle punch techniques.

These are my thoughts on the book....

First of all the likes:
  • She presents a couple of unusual ideas for "materials" to use, although the majority are rather predictable.
  • The initial "getting used to your machine" projects are well explained
  • There are some beautiful and inspiring photos.
  • She offers some useful tips on how to avoid breaking the needles.
  • The section on creating tucks and folds is interesting and has me reaching for my fabric manipulation manual.
  • There are some basic wet felting instructions, I think it is useful to create your own prefelts as backing fabric / embellishments.

The disappointments:
  • She says you cannot turn the fabric while embellishing, this isn't true, so long as the needles are moving at a reasonable speed you can move the fabric in any direction, including turning it.
  • I was left with the impression that Sheila had only been using her machine for a couple of weeks when she wrote this book.
  • Although she talks about shading by needling from the reverse side, there was no mention of adding a different colour to the back and needling through to produce colour mixing on the front. I consider myself to be a complete novice so thought this was a very obvious omission.
  • I would have liked to see more samples showing the effect of the embellisher on different fabrics and materials. 
  • For those expecting an element of "stitch" as the title suggests, I think you will be disappointed, there are only a handful of photos showing pieces that have been stitched and there are no explanations accompanying the few examples there are.
  • There is a brief section about fibre reactive dyeing but no mention of acid dyeing, given that most of the projects recommend prefelt as the base and yarns for decoration I find this a bit odd.
  • The 3 projects in the back of the book, a bowl, a lattice scarf and a bag recycled from a jumper did not inspire me at all, only the scarf looked like it had been made by an adult.
Overall a good starter book for a complete novice but anyone who has used an embellisher before will probably be disappointed.

My intial thoughts on on the Simplicity 12-needle embellisher:
  • The throat plate has an individual hole for each needle - this is good because it means the fabric / wool does not get pushed through the plate.
  • It doesn't have a finish with the needles up facility - this is a bit of a pain because you have to turn the hand wheel to bring them up before you can move the fabric.
  • The presser foot will not raise more than 5 mm making it really difficult to feed 2 layers of medium weight prefelt under the needles. While I appreciate it's not wise to feed multiple layers through at once, you really should be able to feed 2 layers of felt at once.
  • You can use anywhere between 1 and 12 needles, the latter allows really quick coverage of large projects.
  • Each needle can be replaced individually, I understand there are some machines that expect you to replace the entire head when you break the needles.
  • The replacement needles are quite expensive (about £2 each).
  • The machine is small and light-weight, the carry handle on the top makes it very transportable.
These are the results of my first experiments with the embellisher, I can see it being most helpful using up my thicker fabric remnants and the synthetic organzas that don't nuno felt that well. Some of the fabrics in these pieces have metallic qualities that catch the light very nicely.


Sunday, 18 October 2015

Productive Weekend

It's not quite finished but now the sleeves are attached the hooded jacket looks a lot closer to finished.
Front

Side

Back

It just needs a button and some top stitching down the front and it is finished

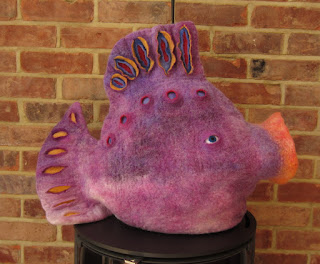
Yesterday I made another cat-eating fish, cat cave from some hand-dyed Corriedale.


Feeling inspired by this pine cone:

I made a bowl:


And I finally finished these 2 scarves, originially I put a rolled hem on these but did not like the finish so removed the hems, reshaped the scarves and felted the edges to stop them from fraying.

The silk is still very shiny, the photos really don't do it justice at all.


What have you been up to?


Monday, 12 October 2015

Fourth Quarter Challenge 2015

I'm still feeling a bit direction-less on this challenge, ambling from one idea to the next but I have at least managed to commit to making a couple of pieces of felt this week, both based on the challenge.

The first is a small hanging based on this photo of some cone flowers (rudbekia):

My idea for this picture was to use different tones and shades to visually bring some of the flowers forward while sending others into the background.

Using the ball of ochre coloured wool in the middle of this photo I blended some different tones and shades by adding different quantities of white or black.


And used these batts to make some prefelts:

I confess I cheated a little - the yellow in the middle is not a tone or shade of the ochre colour, the original colour is the square 2nd from right on the bottom row.

These prefelts were cut up and arranged on a square of black commercial prefelt:

After lots of rubbing and a little bit of rolling all the pieces are firmly attached and it is ready for some finer details to be added.

I quite like the jolly, cartoon-like effect but think I can make the flowers look more 3-dimensional with some shading using the left over prefelts and pieces of the batts.

This weekend I also made a start on a hooded jacket, again applying the challenge instruction of using just one colour plus black and white. There's still some way to go but here is a little taster...

Rummaging through my stash I found some bundles of carded natural merino batts in white and dark brown, I had an idea that using batts would speed up the layout, which it did, but any time I saved in the initial lay-out was lost needle-felting more wool over the thin spots at the prefelt stage. :(

I attached a hood to my favourite dress resist. Masking tape is great for making temporary changes to resists. You can see where I have permanently altered this resist to add sleeves using duct tape.

Laying out the wool with some lovely Wensleydale locks for extra texture and some white mulberry silk for a little bit of sheen.

Starting to layout the front sections:

With a little luck I hope to post the finished jacket next time.

Saturday, 3 October 2015

Q4 Challenge and Winkworth Arboretum

The final Felting and Fiber Studio Form challenge for this year centres around tone and shade, mixing white and black with a single colour. Although I had a small hand in creating this challenge I know I am going to find it difficult to retrain myself to a single colour. I can't resist the drama created by placing complimentary colours next to each other.

Last weekend we paid a trip to Winkworth Arboretum, a National Trust property just south of Godalming in Surrey, a beautiful place, especially with all the trees just starting to turn red and gold, and definitely worth the excursion if you are an NT member. These are just a few of the photos I took.


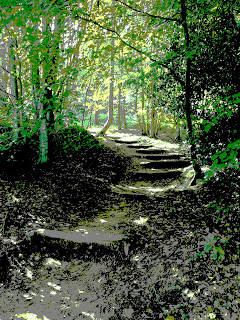
I am finding myself strangely drawn to the last image, I think it is the feeling that path is inviting the viewer to some unseen destination.

Initially I had an idea to create a triptych wall hanging depicting a woodland scene with one panel each of yellow, orange and crimson but I am already wandering off on another tangent. I might still come back to that idea though as I still think it has "legs".

After having a play with the colour tools in GIMP (a free photo-editing software that is similar to Photoshop), these were the front-runners:


I quite like the last one which is more of a grey-scale with the greens added back in, although the third image down, also has merit, that one is essentially a posterised version of the last image but I am finding it looks like there is snow on the ground while the trees are in leaf. The greens are also showing splashes of blue and yellow rather than just shades and tones.